Photoframe CD player
2025.07
@Home
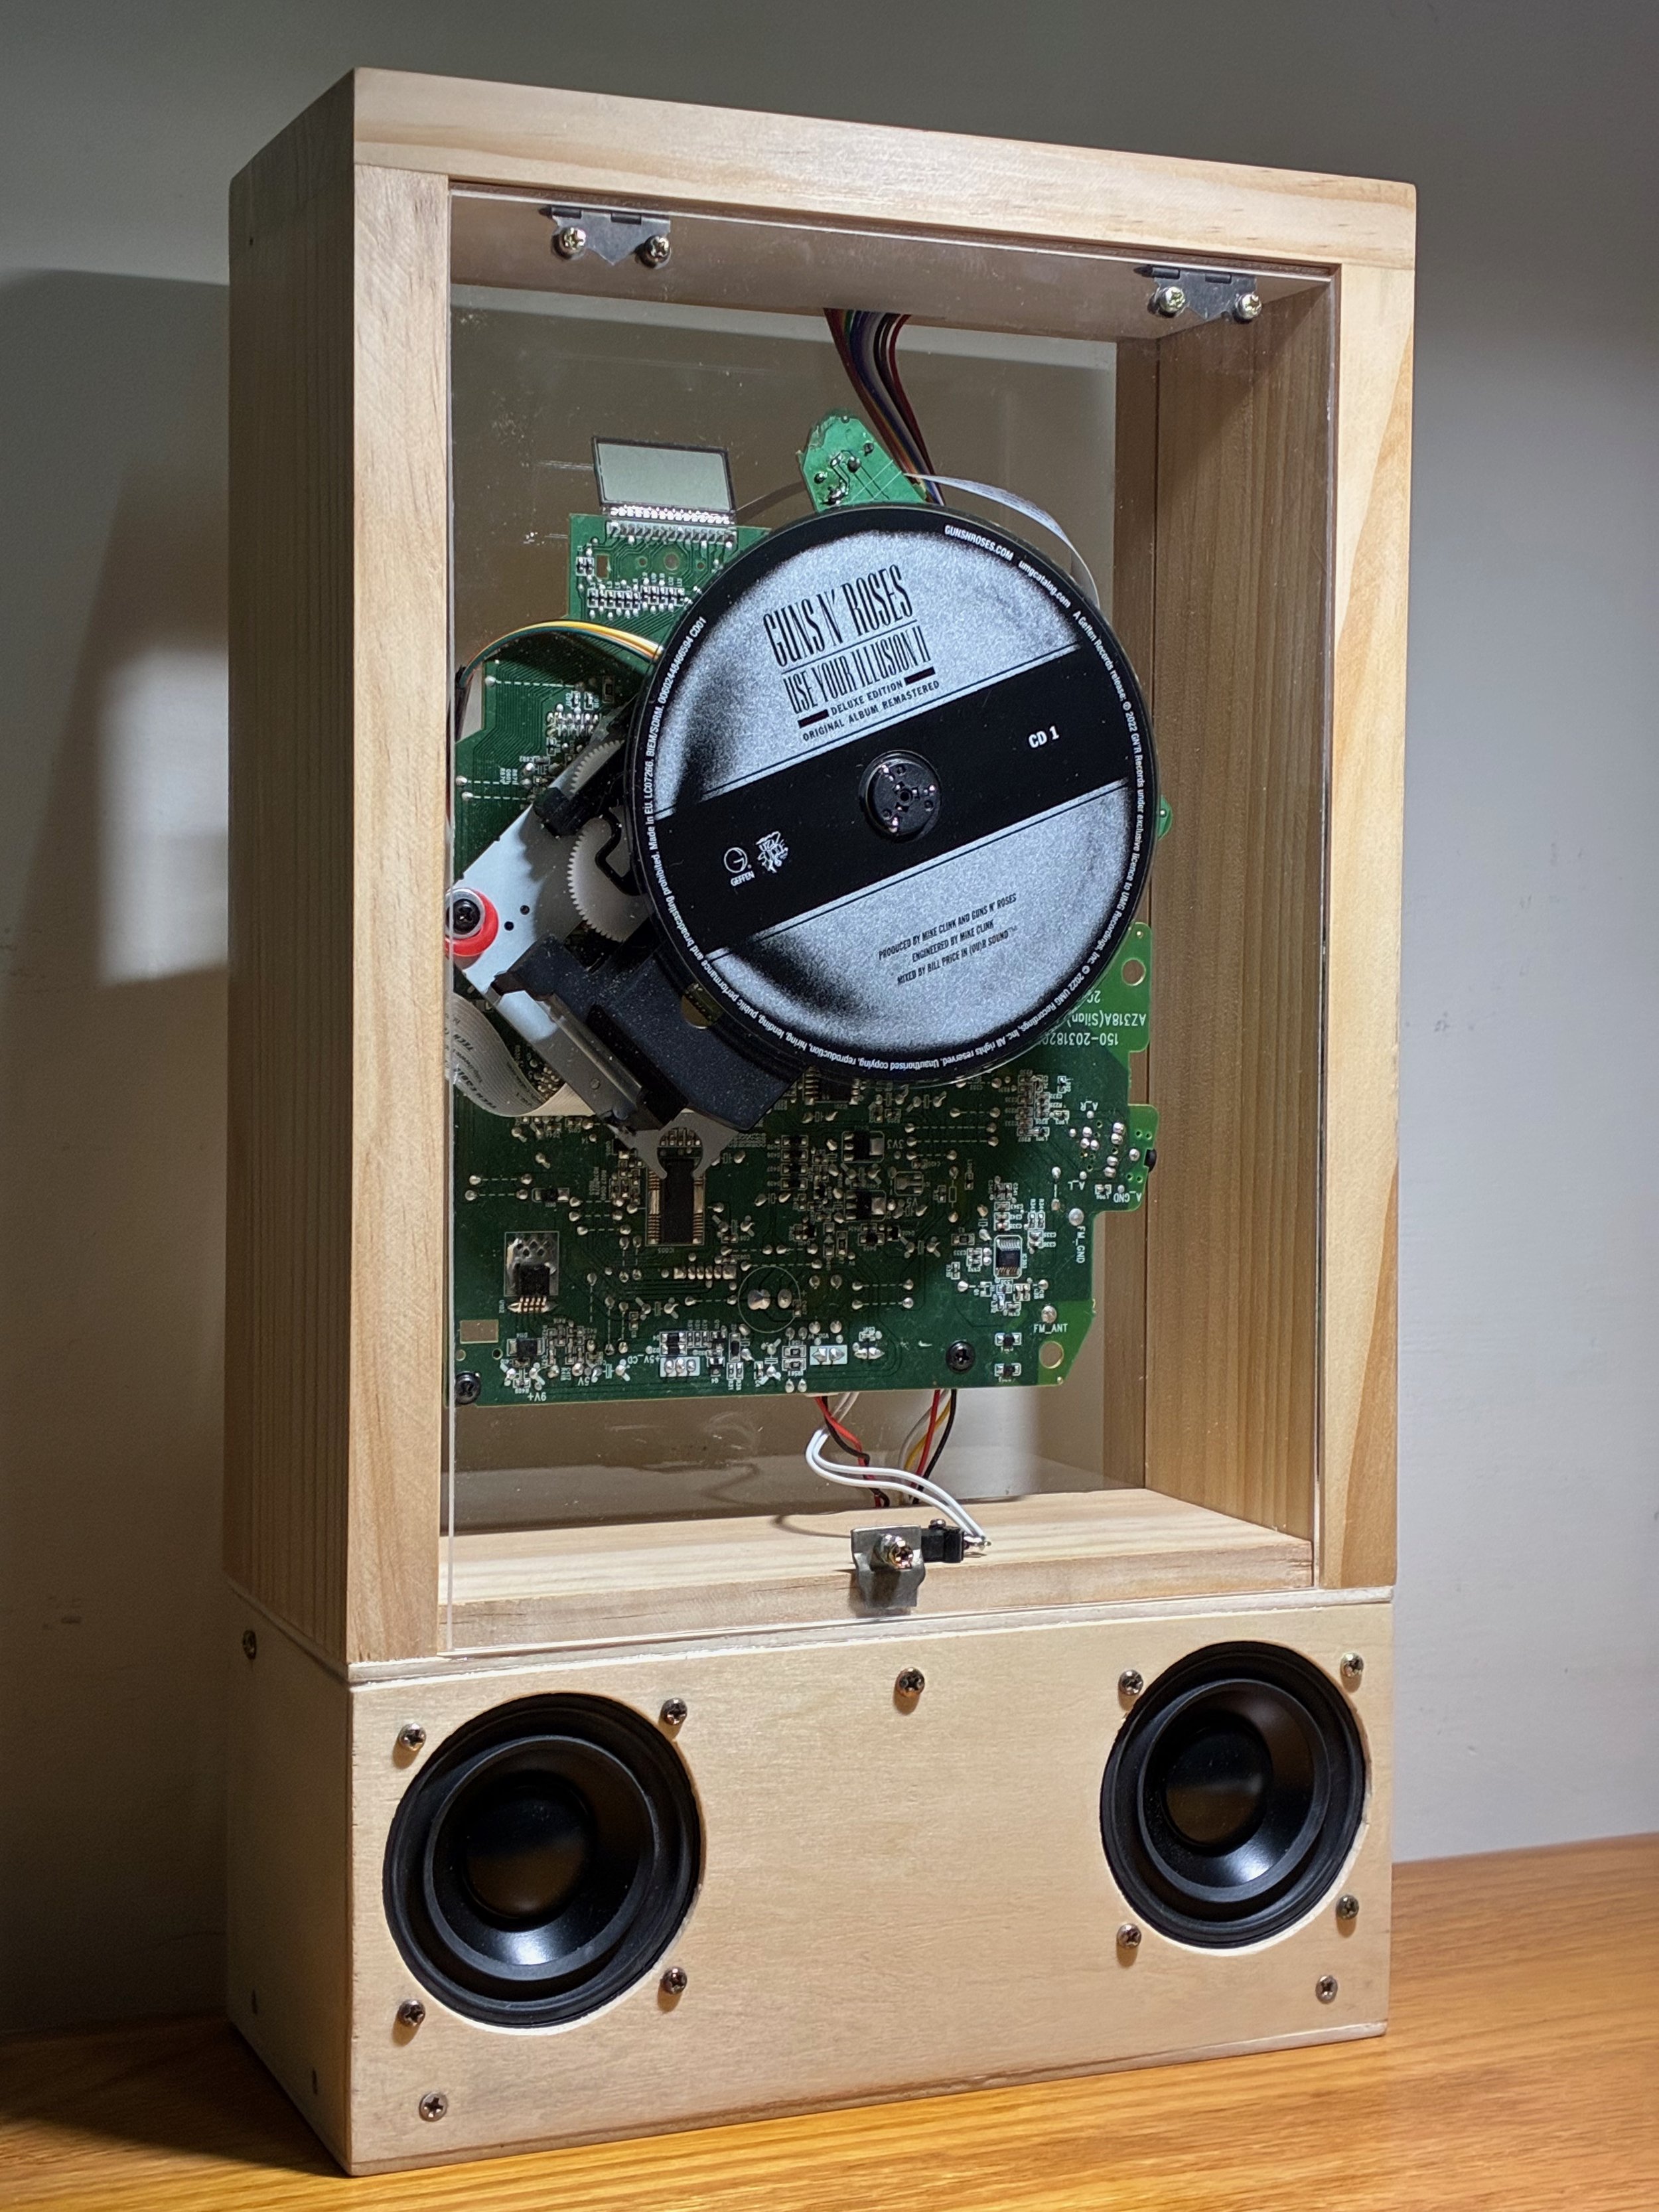
Music can be more than just music. It’s a combination of auditory, visual, and emotional experience. Here, I present this Photoframe CD player to take us back to the essence of “listening to music.” You get to listen to the high-quality music straight out of a CD, see the gentle spinning by the mechanical player, and feel the nostalgia from the warm wooden texture of the classic photoframe design.
Design Concept
This project was inspired by this product from CoolGeek. I thought the idea of showcasing a CD and the electronics vertically within a photoframe while playing it was pretty cool. It can be a good-looking house decoration instead of those big old chunky CD/Radio players.
However, I didn’t agree with the fact that this product needs to connect to an external Bluetooth speaker in order to play music. CD can give high-quality music if played directly, while the connection via Bluetooth basically means that it would be compressed. Connecting speakers into the system will significantly increase the weight and the difficulty of space organization, but I think it’s more important to incorporate this “essence of CD” in the design if we want to make one.
I chose the texture of raw wood for all the structural parts simply because I like the nostalgia it gives. I guess it’s because most of the furniture in our house is wooden.
Decompose & Recompose
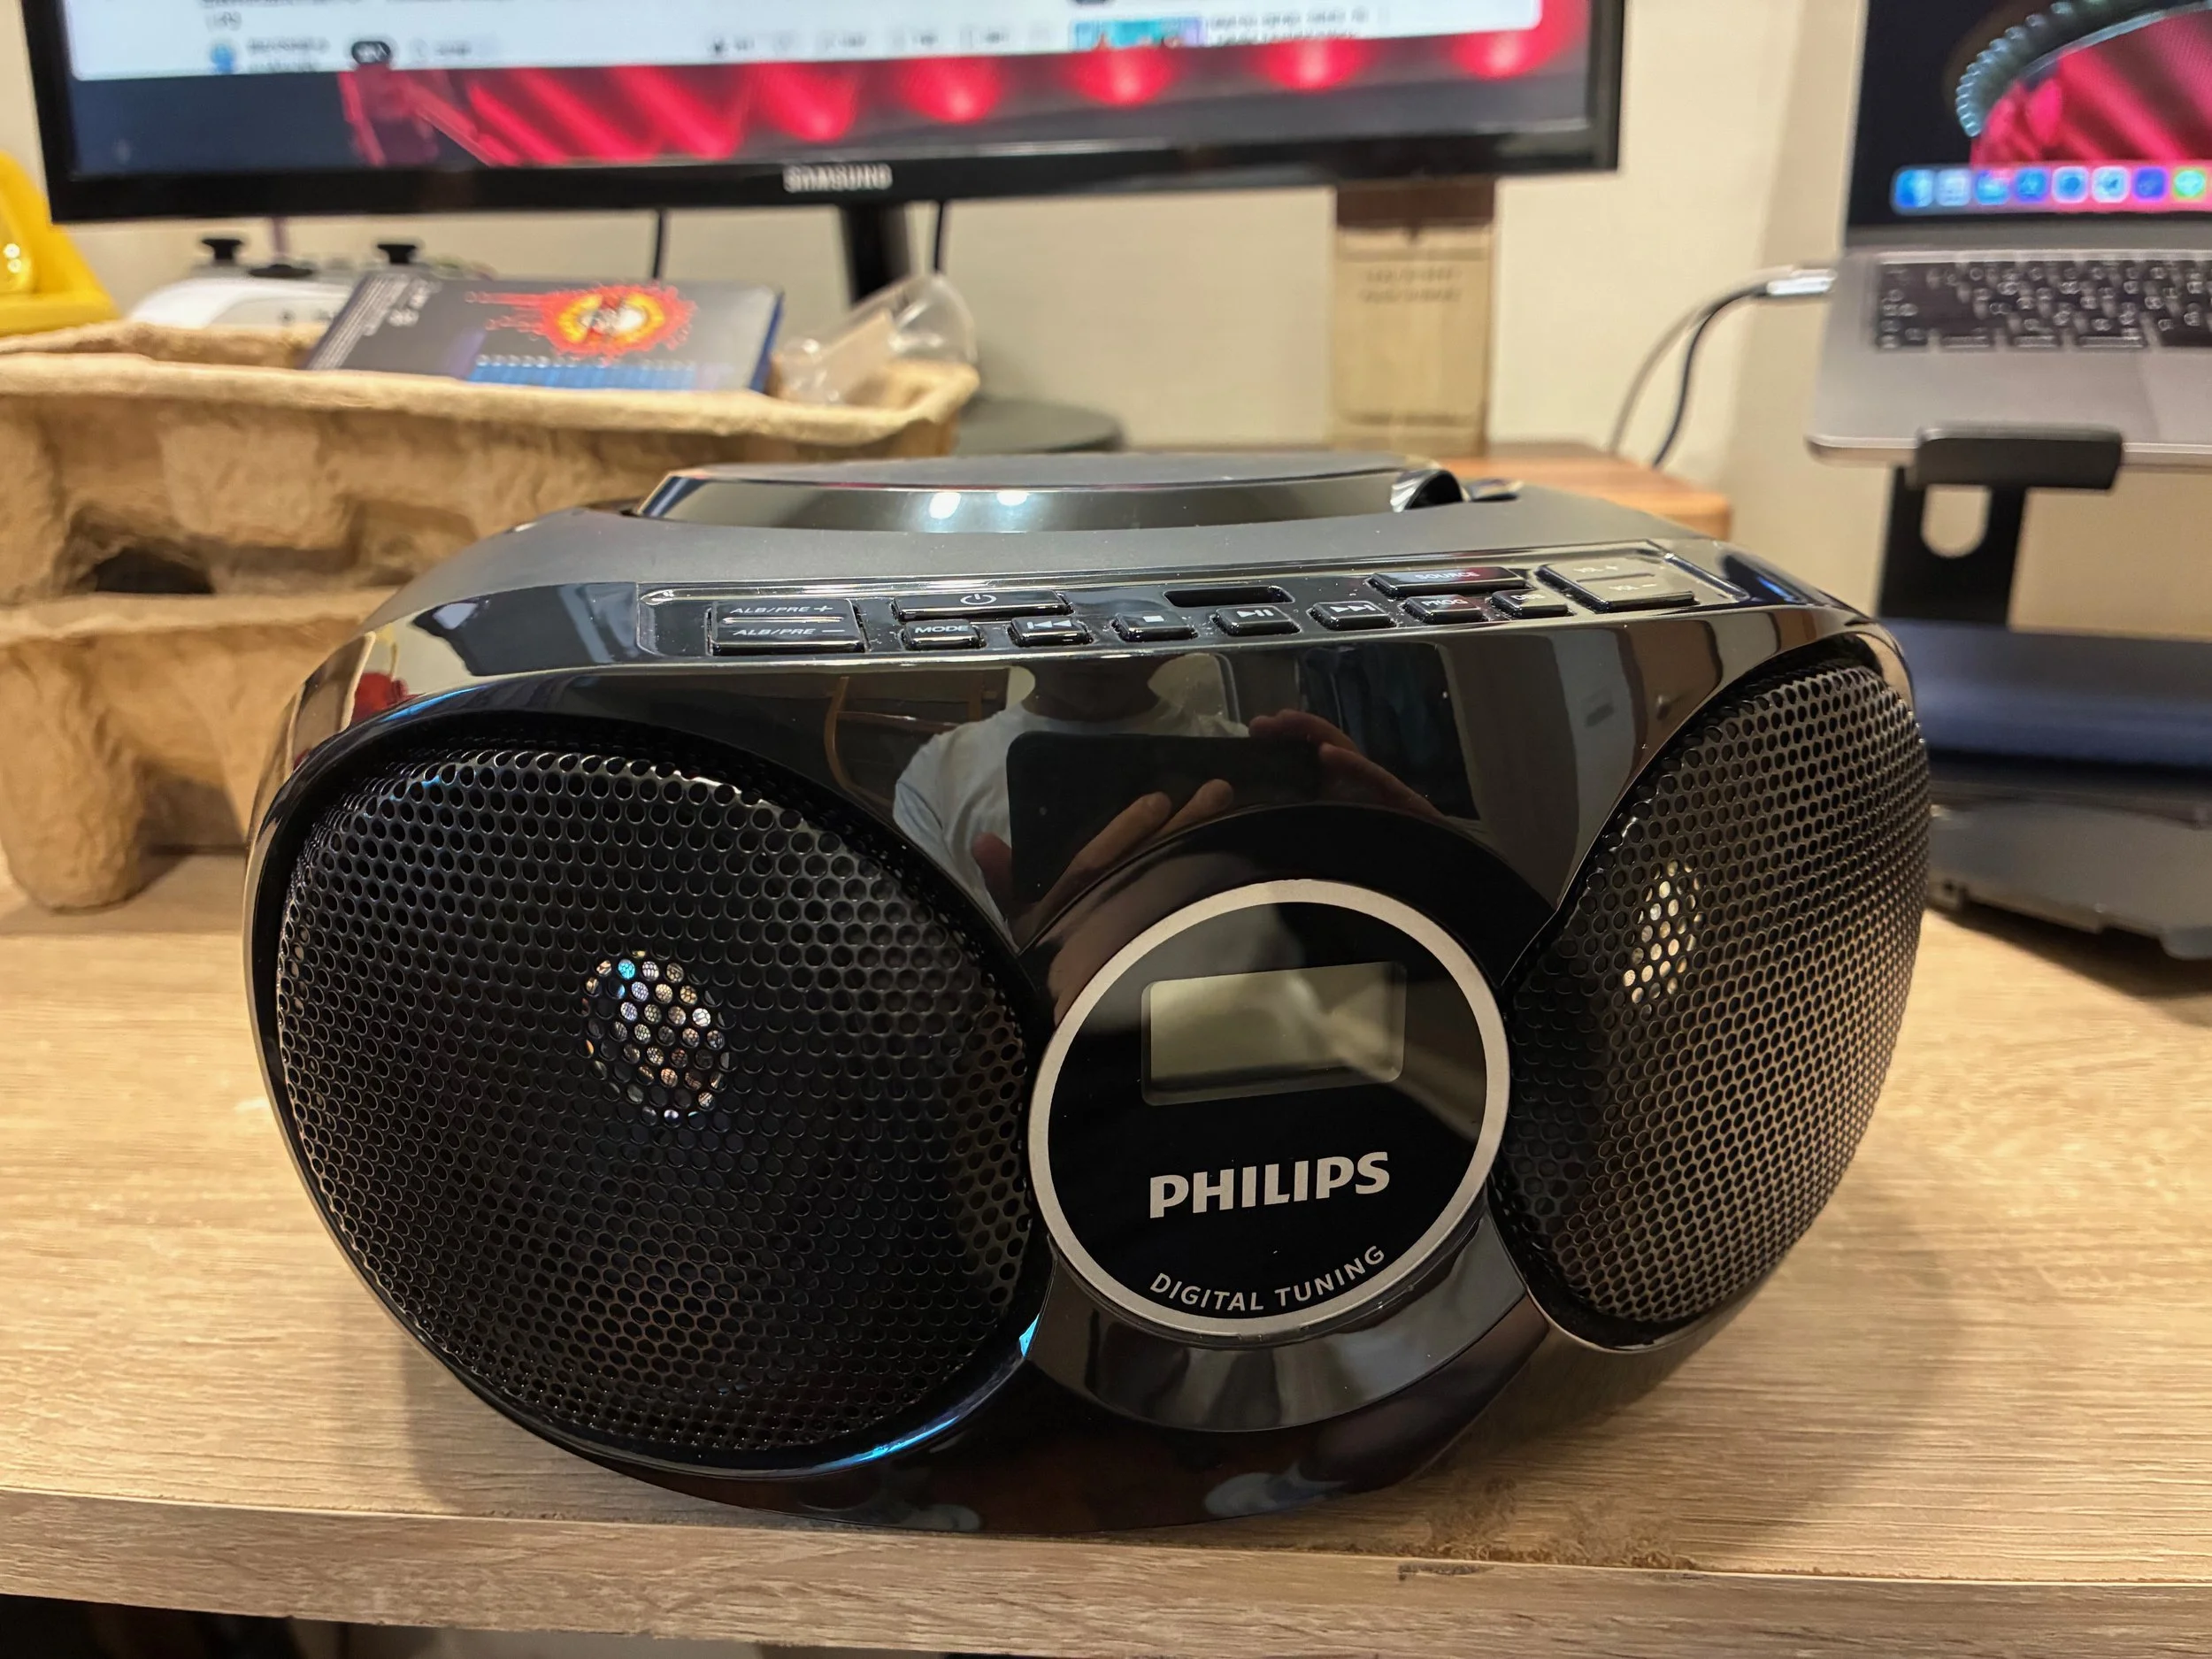
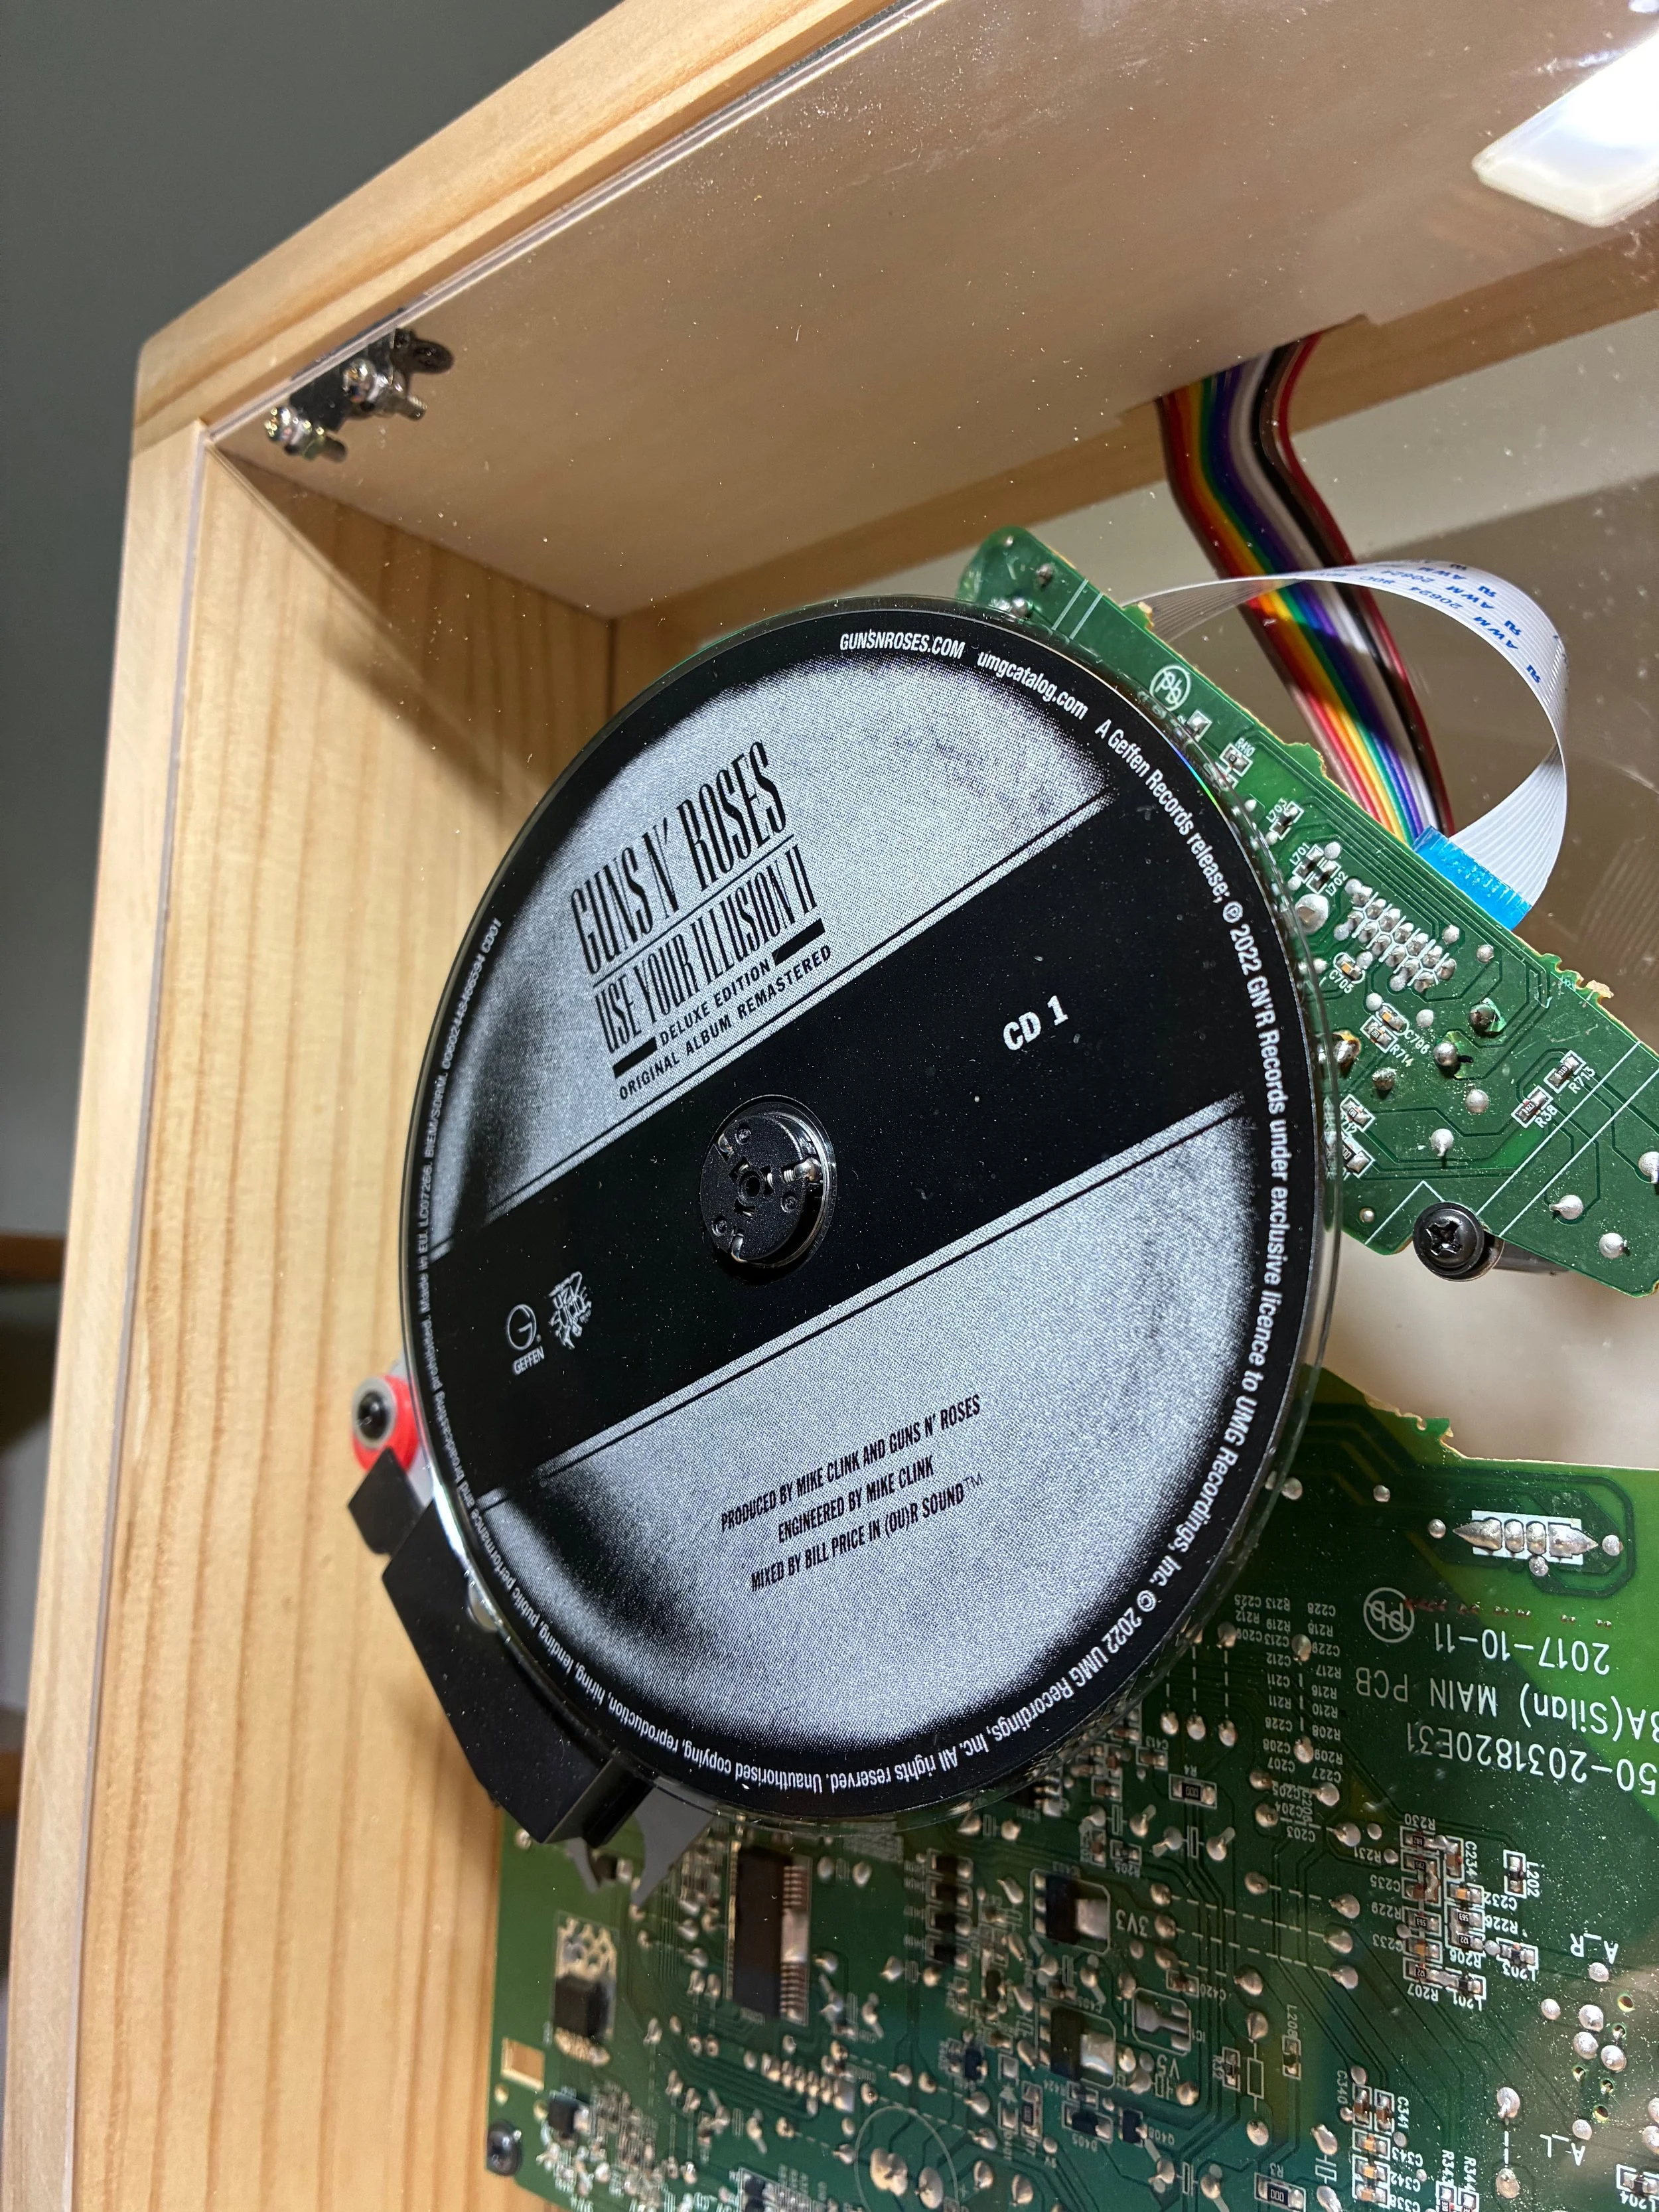
I bought this second-hand PHILIPS multifunction portable player for this project. After testing its functionalities, I immediately decomposed it to see how I can put the mechanical player and the electronic boards together on a flat surface. It’s kind of a wild move because typically you don’t have any idea what the specifications of the internal parts are before you break the machine down.
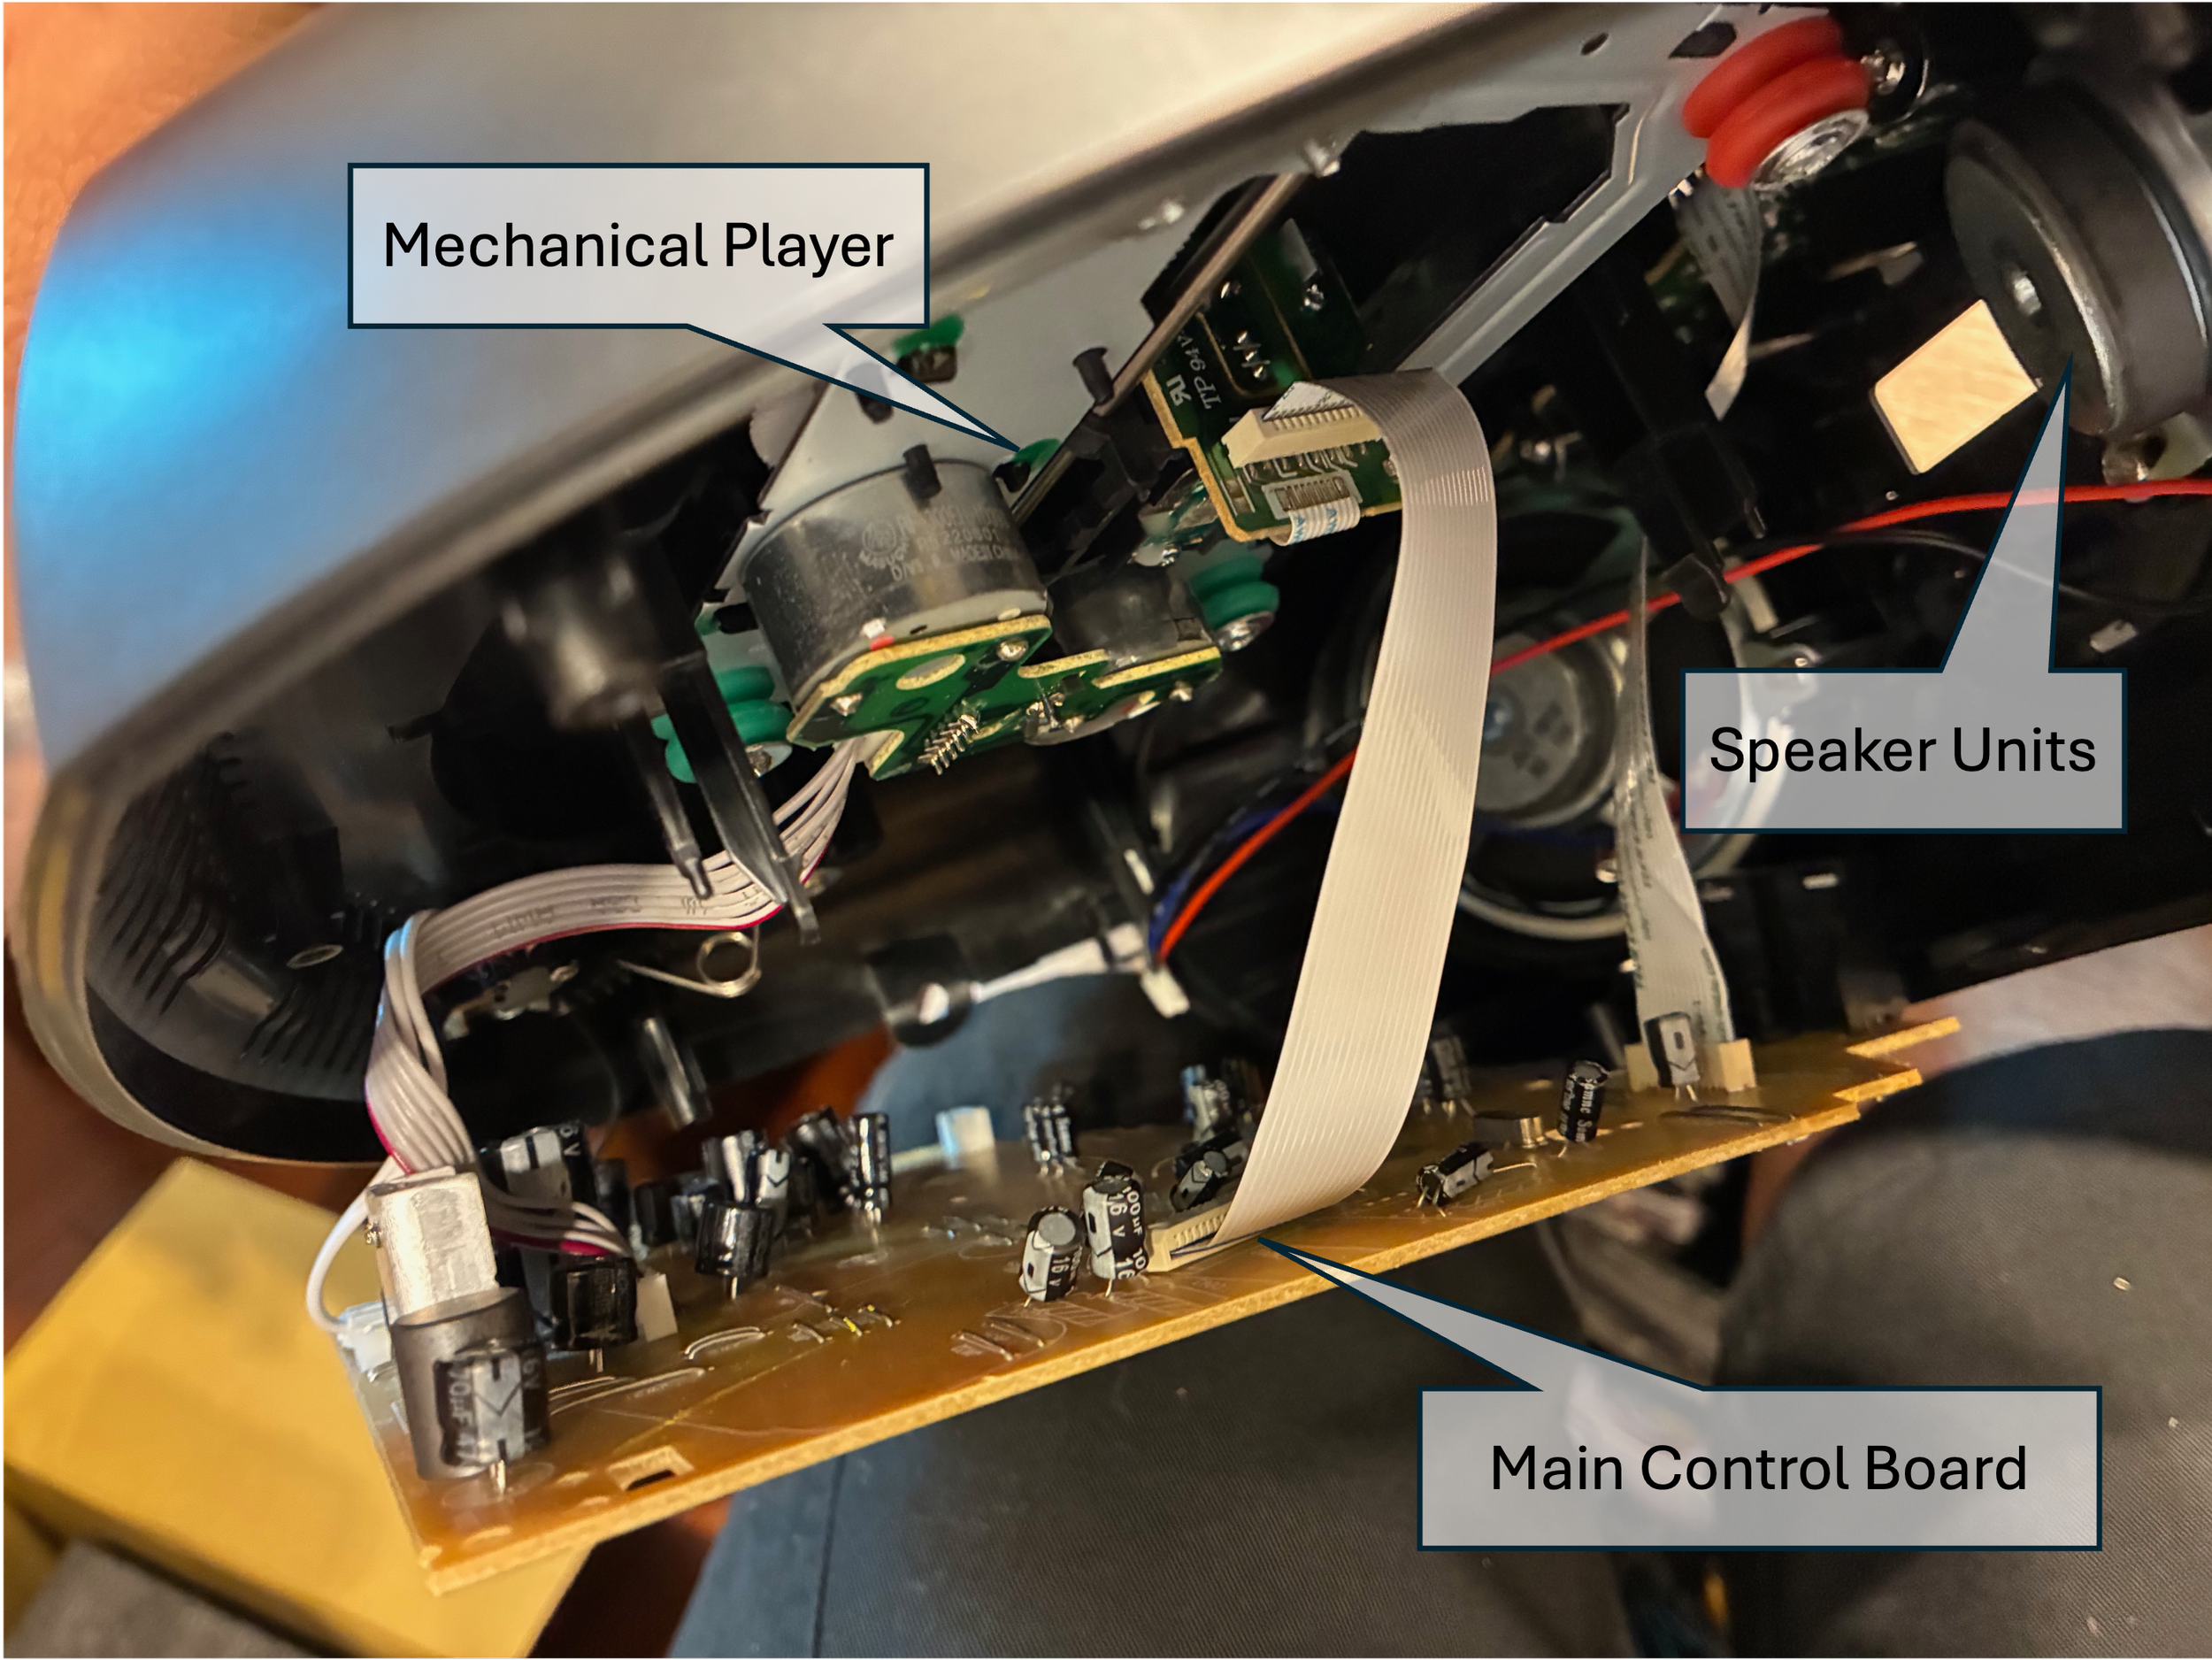
Those parts were arranged and stacked on a clear acrylic board via some M3 stud bolts and nuts. I tried pretty hard to find the compatible wires between each module for replacements, since the spatial distance between them would increase a lot if expanded on a surface. To be honest, I didn’t have any experience in using the flat Ribbon cables and didn’t know the specifications of the interconnections at first, so I’ve learned a lot of them when spending afternoons browsing in the electronics store.
I was very lucky that everything fit into the acrylic board (A4-sized, 3 mm thick) that I had, and they were compactly organized without excessive wiring.
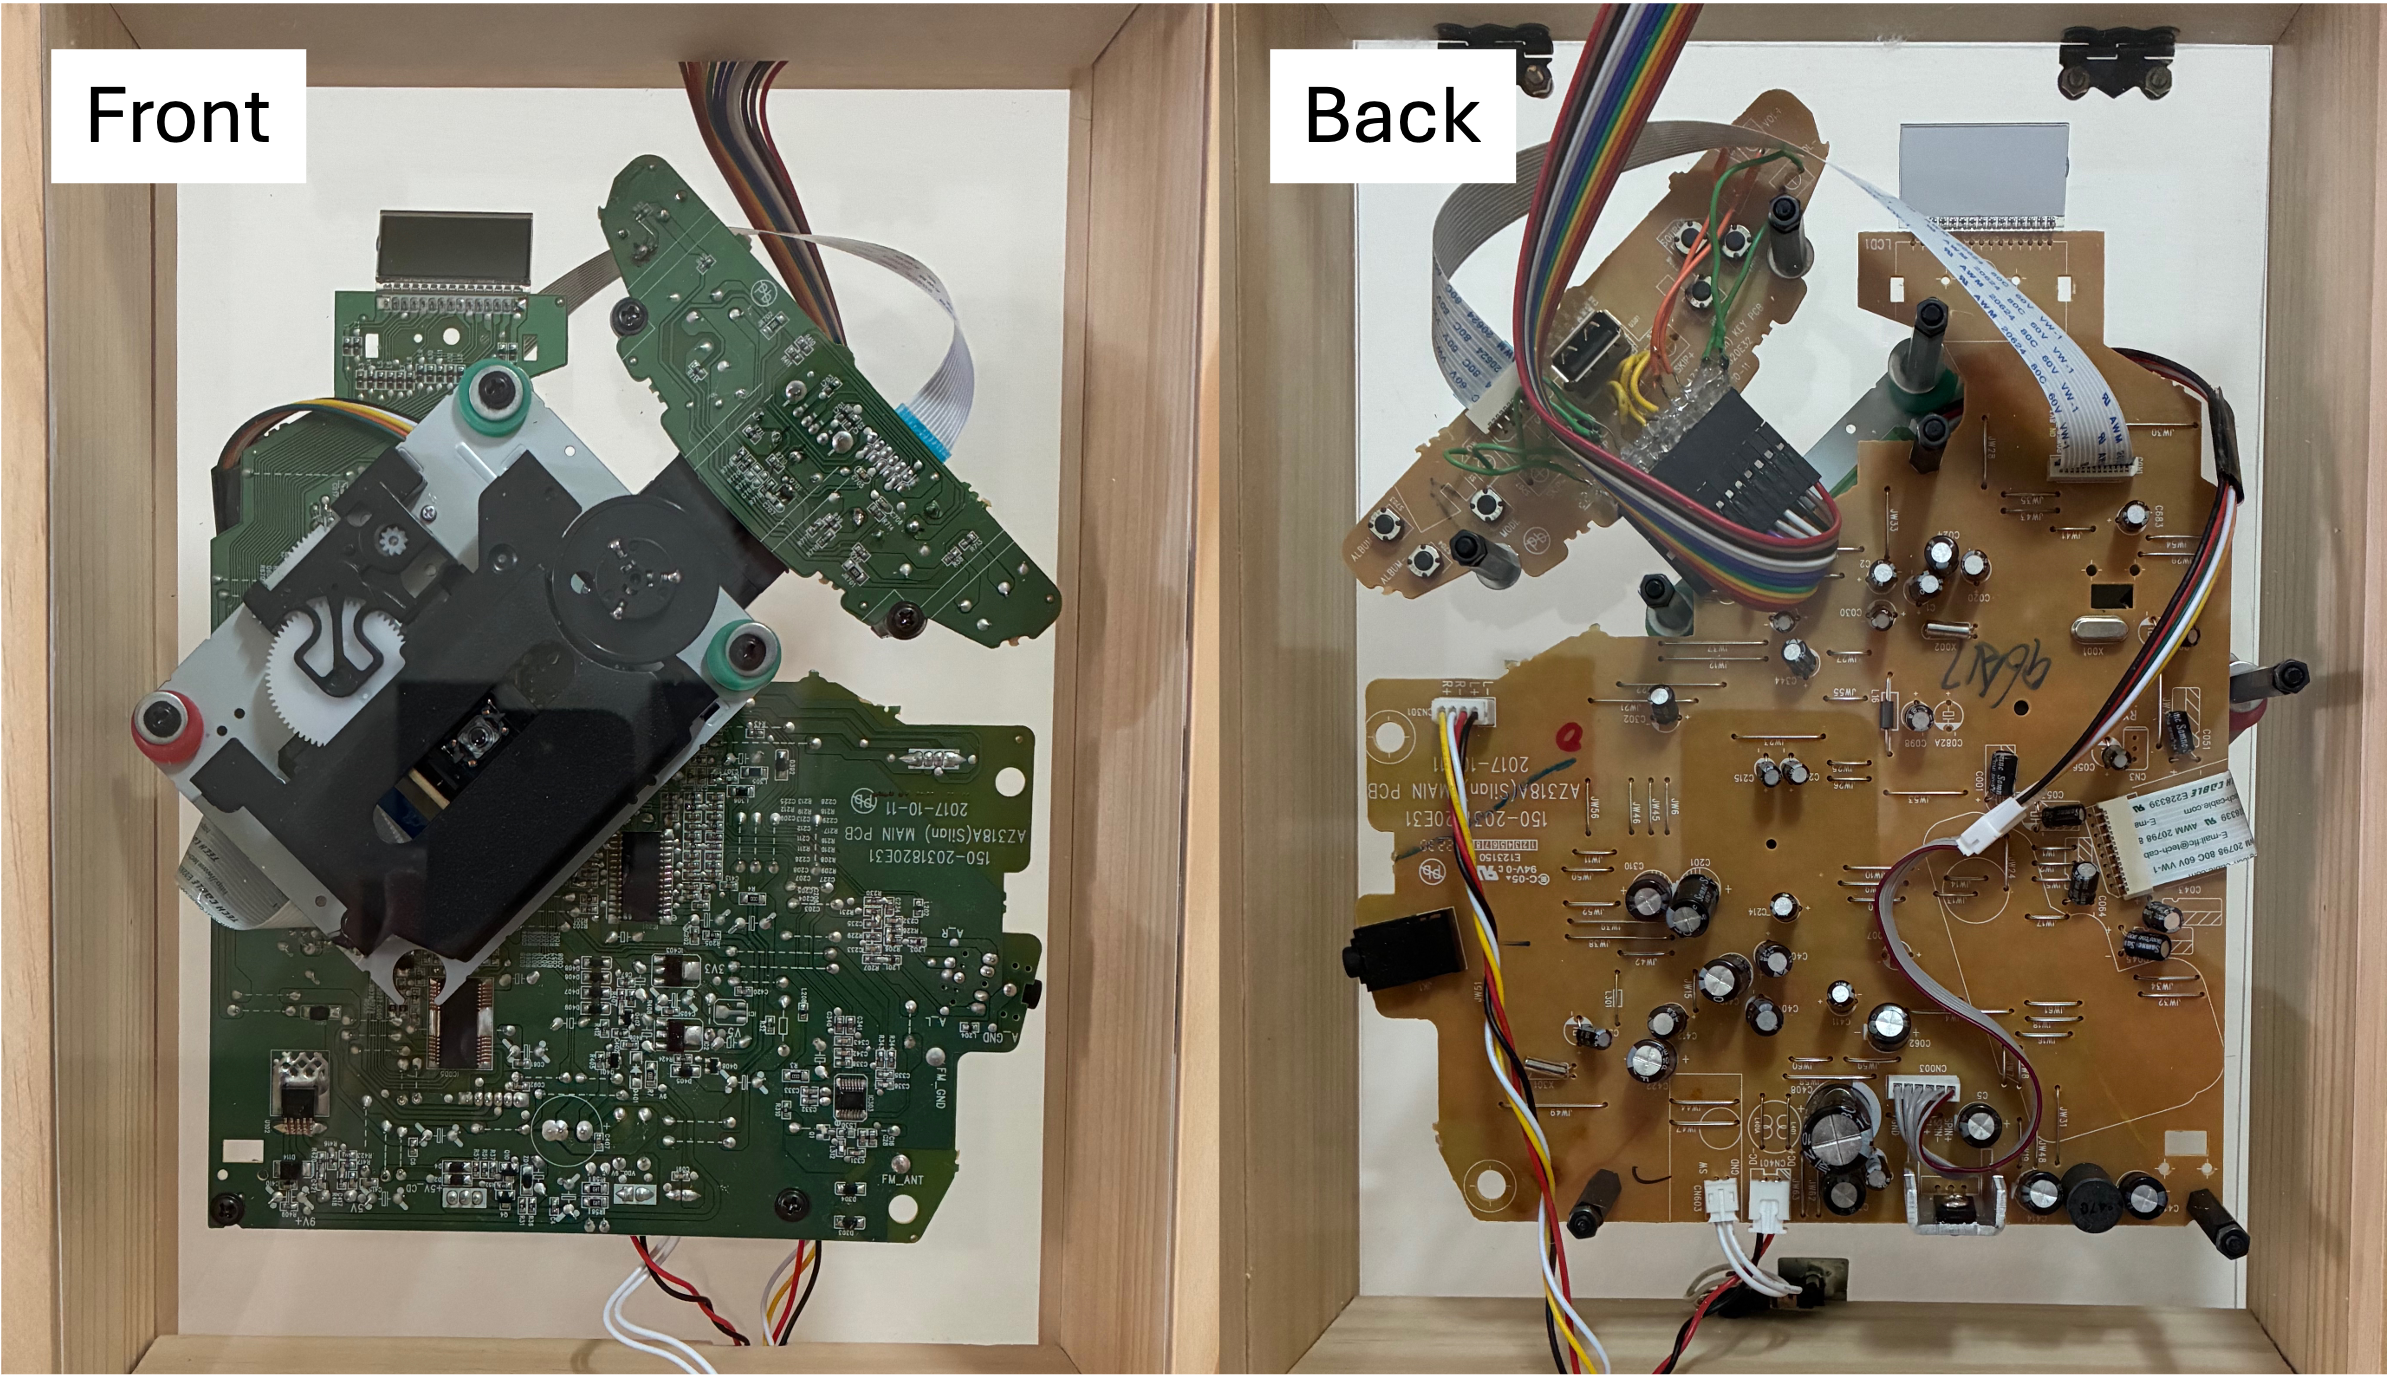
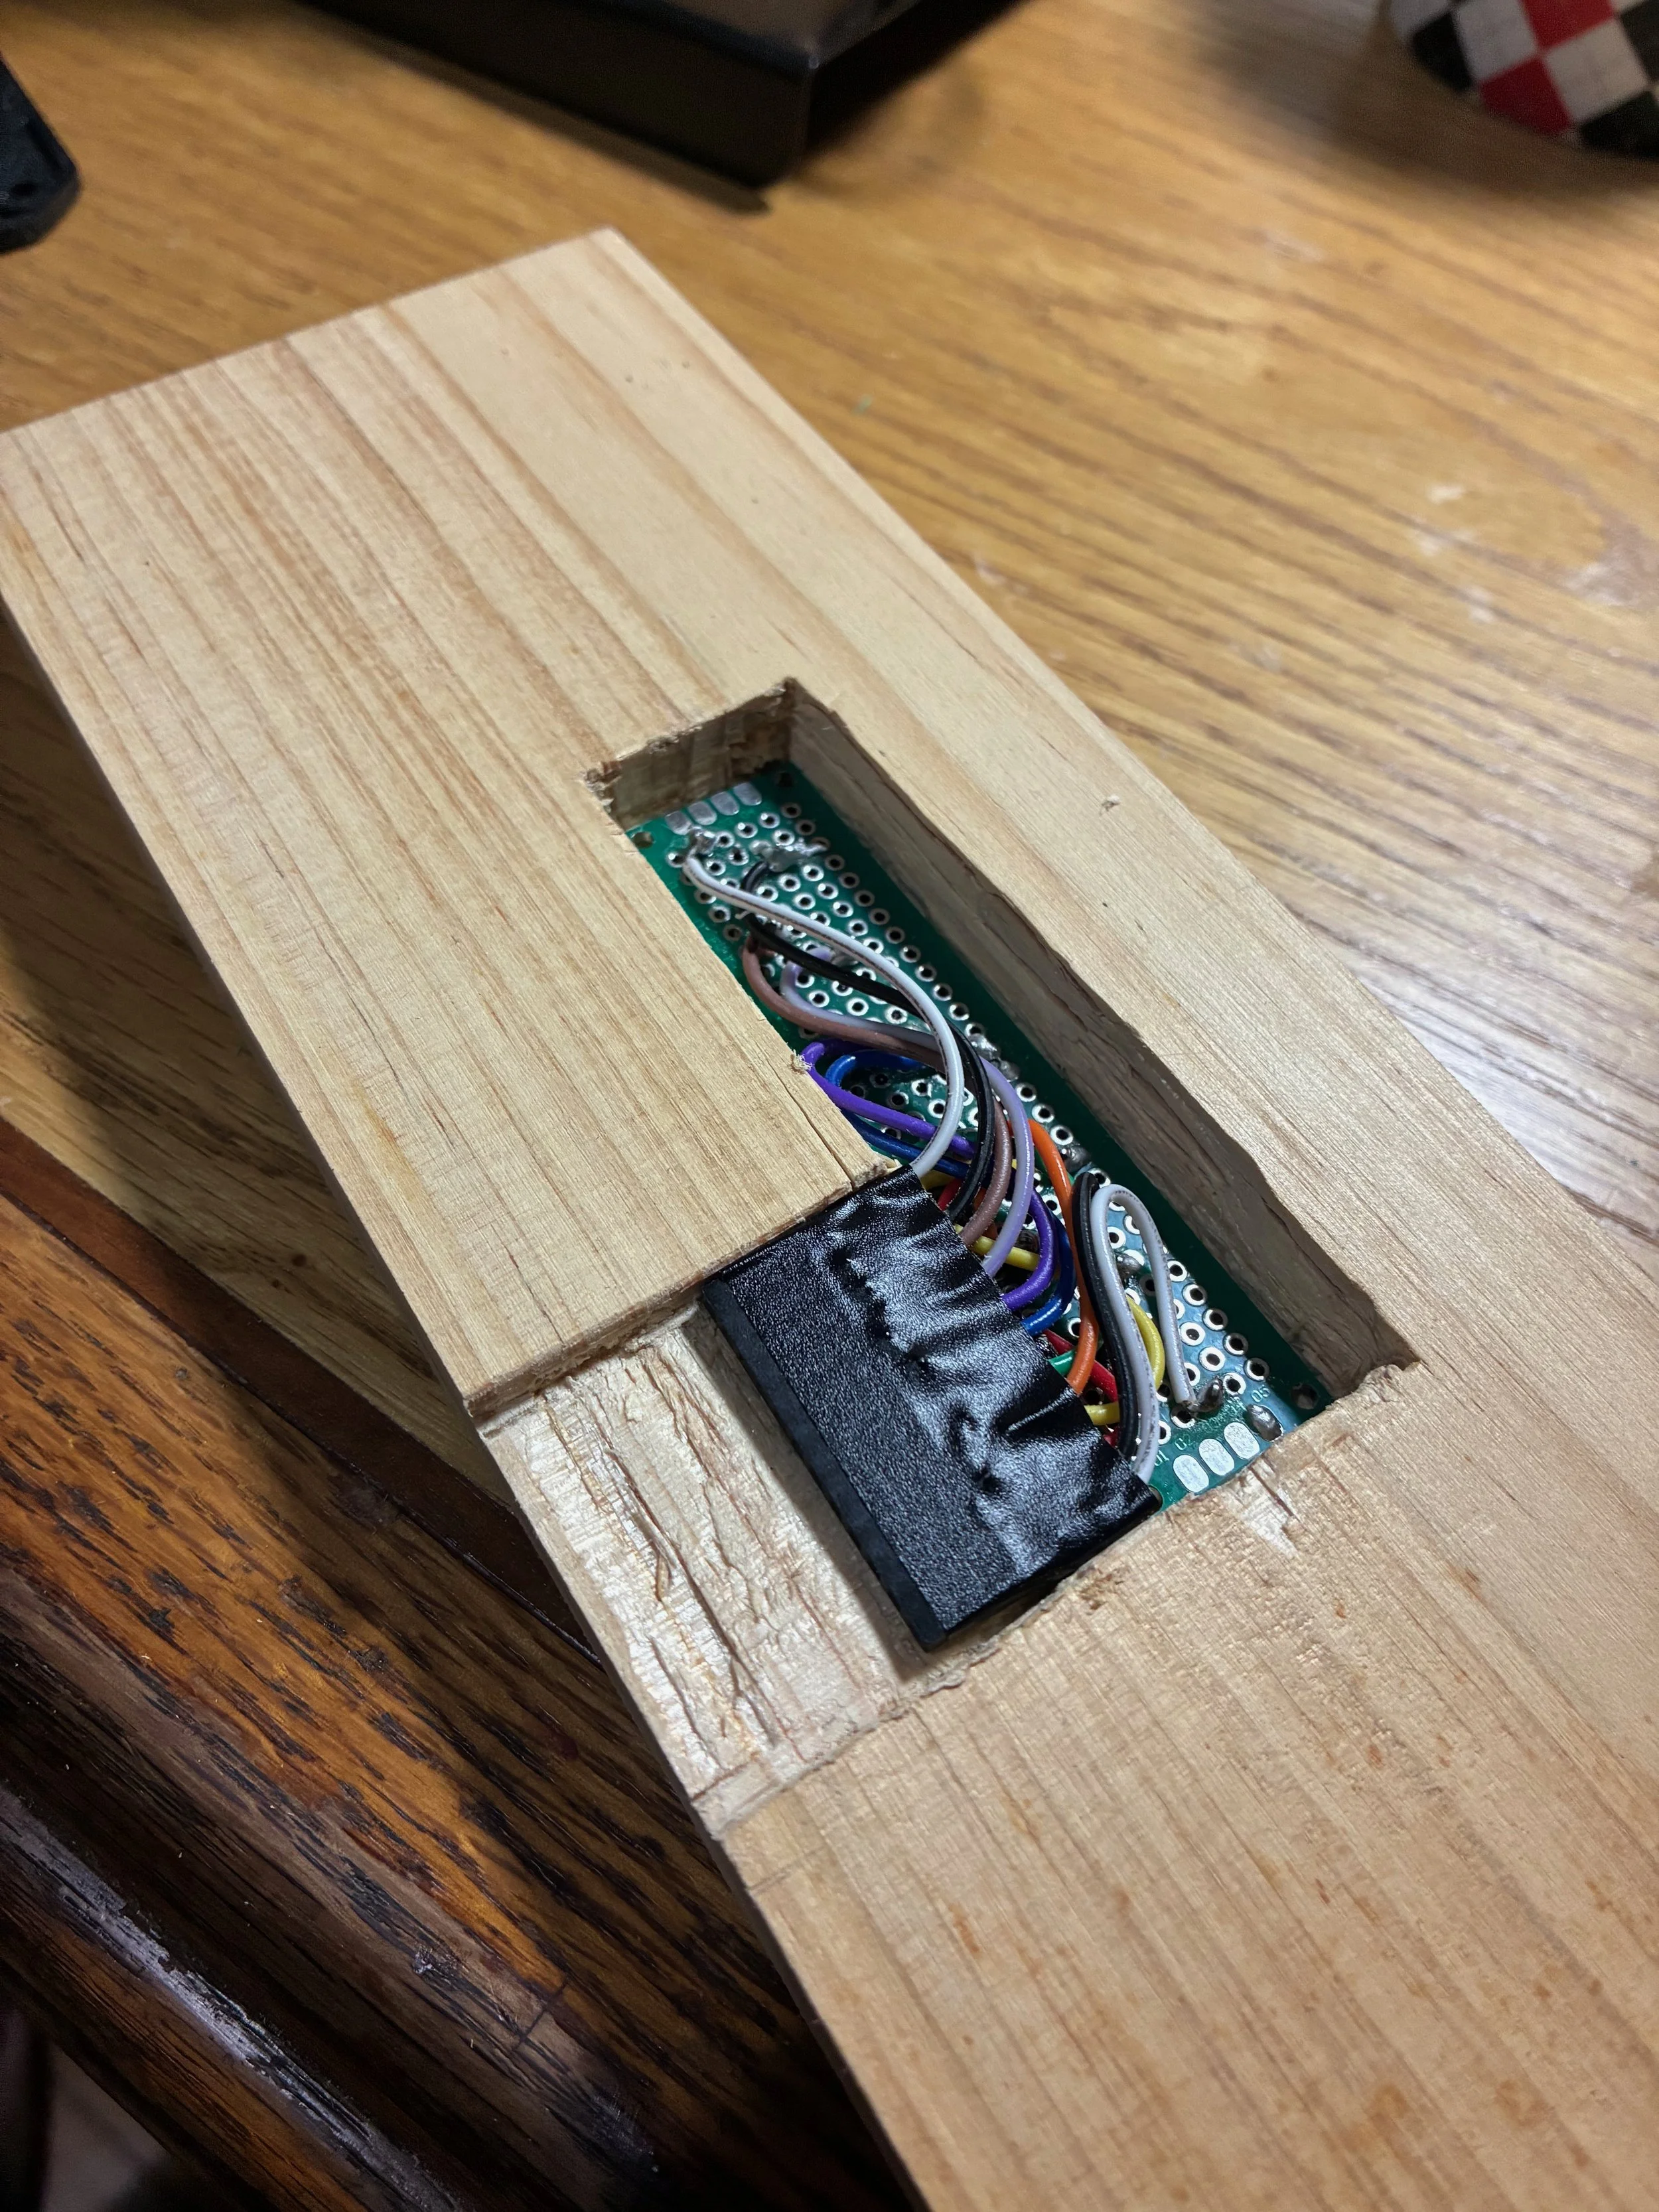
The original player has too many functions that I didn’t want, such as USB, radio, and AUX input options. Therefore, I made the CD-only buttons functional by soldering a set of additional wires with external buttons to the corresponding ports. Soldering multiple wires in a limited space requires some techniques and a lot of luck!
Woodworks
The main structure of the photoframe was made by pine woods with a thickness of 18 mm, and the bottom speaker parts were made by thin pine wood sheets with a thickness of 3 mm. I ordered the 18 mm boards with the specified sizes directly from a woodwork shop since I didn’t have the tools to work with them, while I cut the 3 mm sheets by myself using a jigsaw cutter. To create channels at the internal sidewall of the photoframe that allow the acrylic board to be secured, I designed a sandwich structure to stack the boards together, and the middle one, the thin 3 mm sheets, has a width difference of 1.5 mm compared to the outer boards.
The most challenging part was the internal grooves that are meant to reveal the control buttons and hide all the wiring inside the frame. I didn’t have a woodworking router, so I decided to do it using the very basic tools: chisels and a hammer! Making these grooves through an 18 mm thick wood plus height differences is NOT an easy job, while I am pretty satisfied with the outcome.
BTW, Apologies to my dear neighbors!
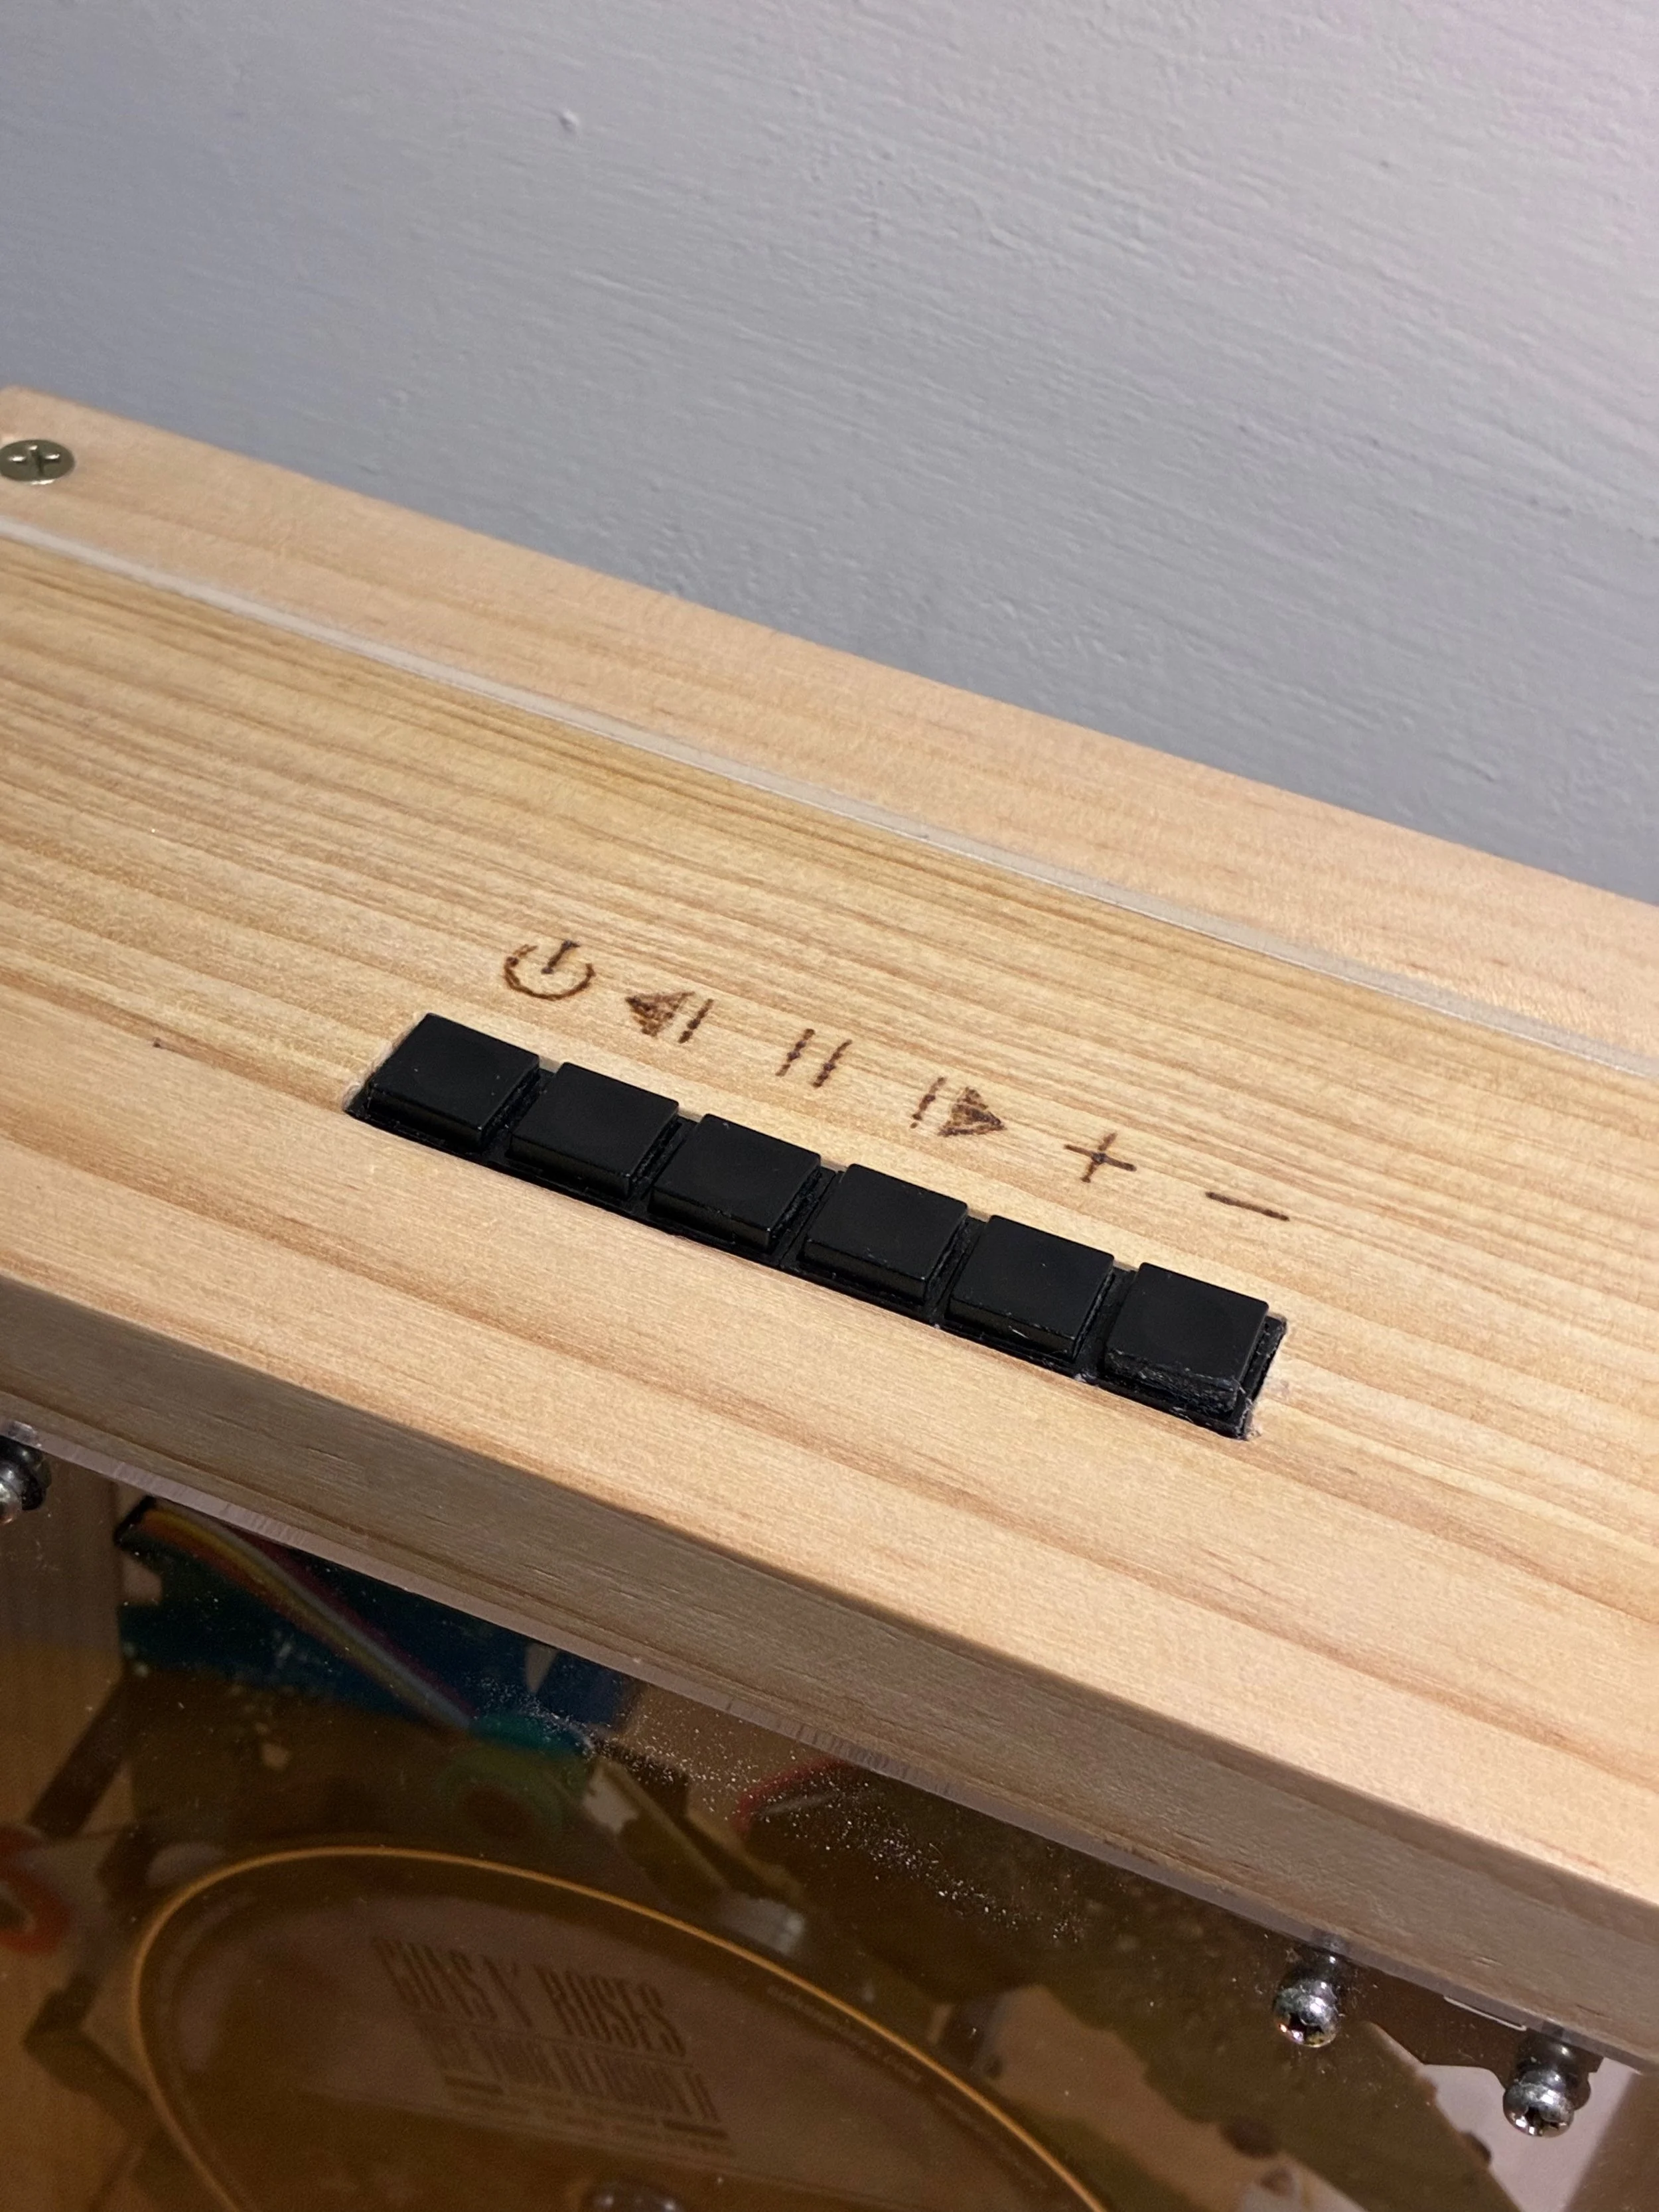
Finally, I used a soldering iron to draw these cute little icons for the control buttons on the top of the photoframe. It’s like the icing on the cake!
Conclusion
I’ve learned so much from this project. It brought together handcrafting, electronics, functional design, and a touch of artistic thinking. At the beginning, I didn’t have every detail figured out—just a single thought: ‘I think I can do this.’ I’m not even sure where that confidence came from, given the gap between the tools and knowledge I had and what was required. But sometimes, that gut feeling is all a maker really needs.
This is actually a birthday gift for my dear big brother Brian, who loves the band GUNS N’ ROSES. Happy Birthday, Brian!